If you want to translate your theme into your preferred language, follow these step-by-step instructions to set up multilingual content for your store.ons
Step 1: Add Your Target Language
Add the language you want to translate to in your store settings:
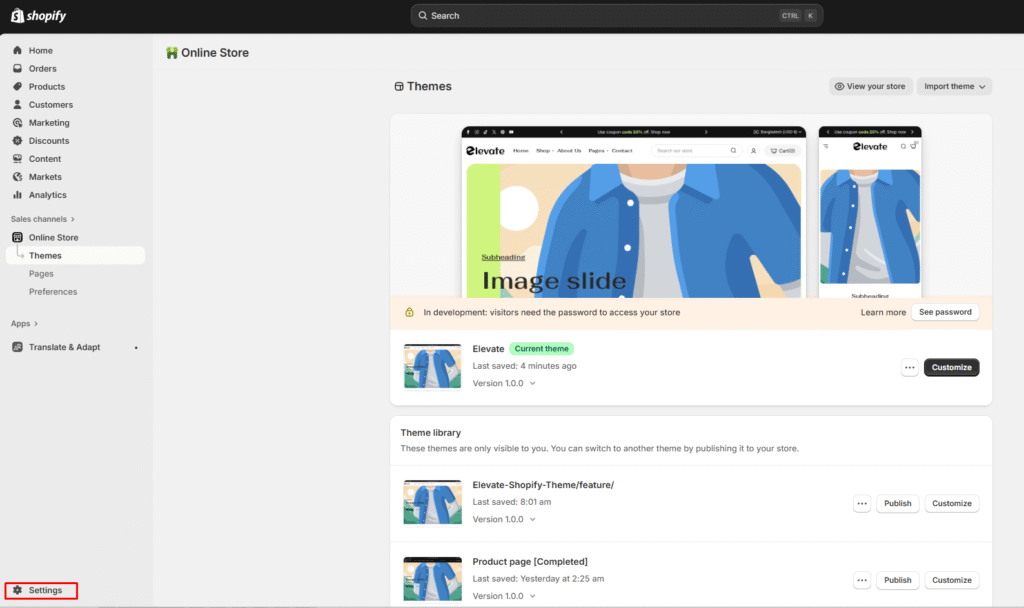
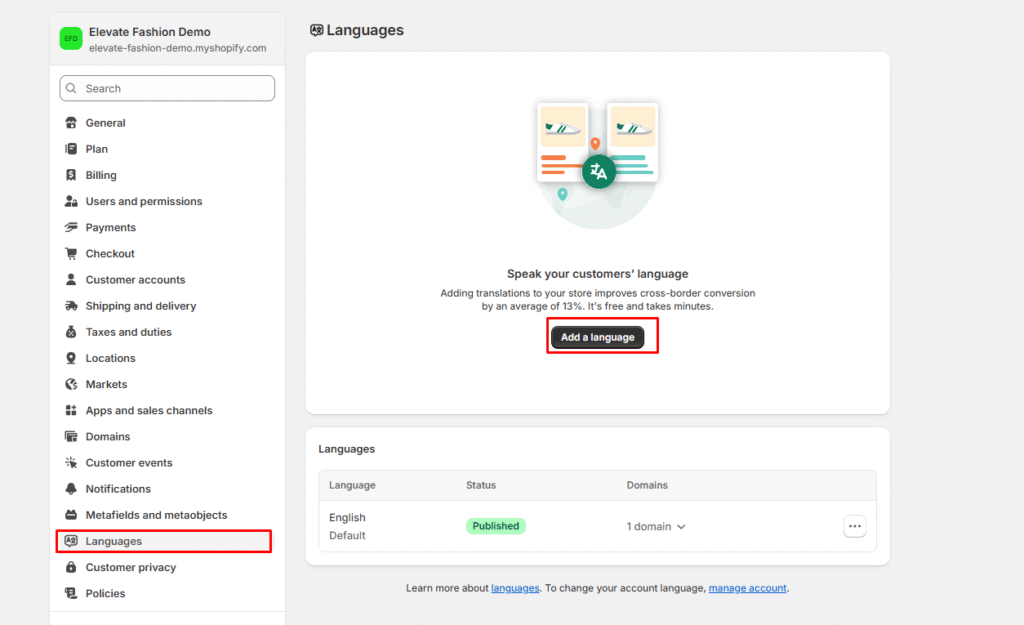
Go to Settings > Languages
Click Add Language
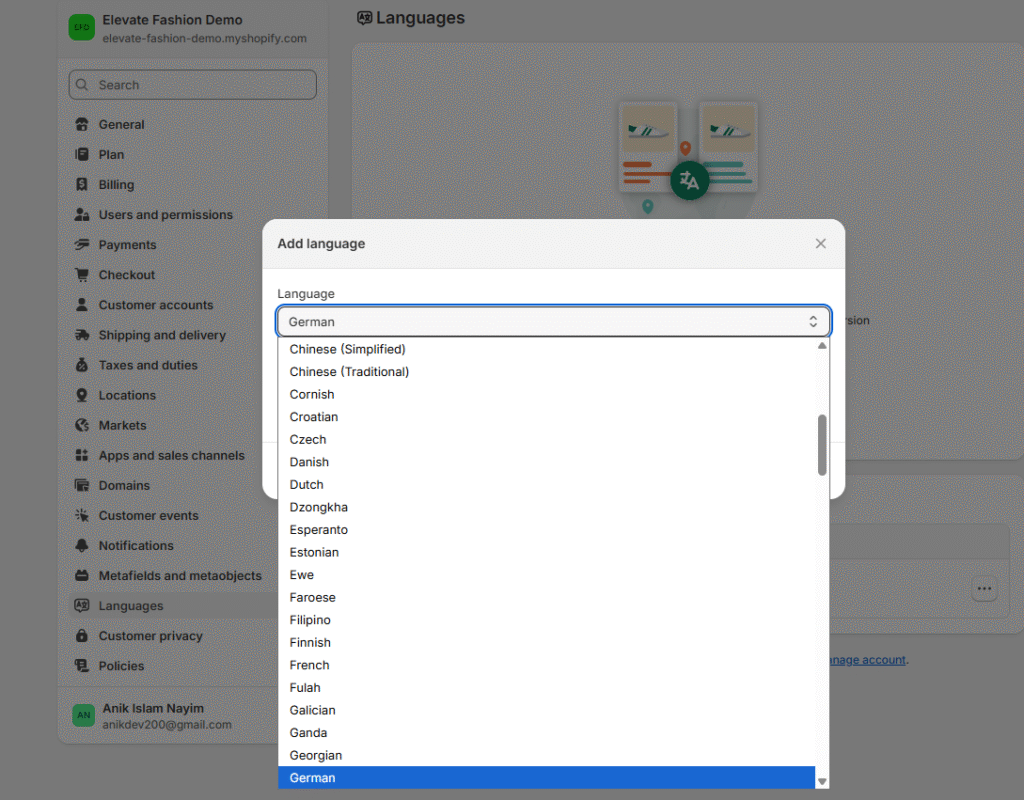
Select your desired language (e.g., German)
Save the changes
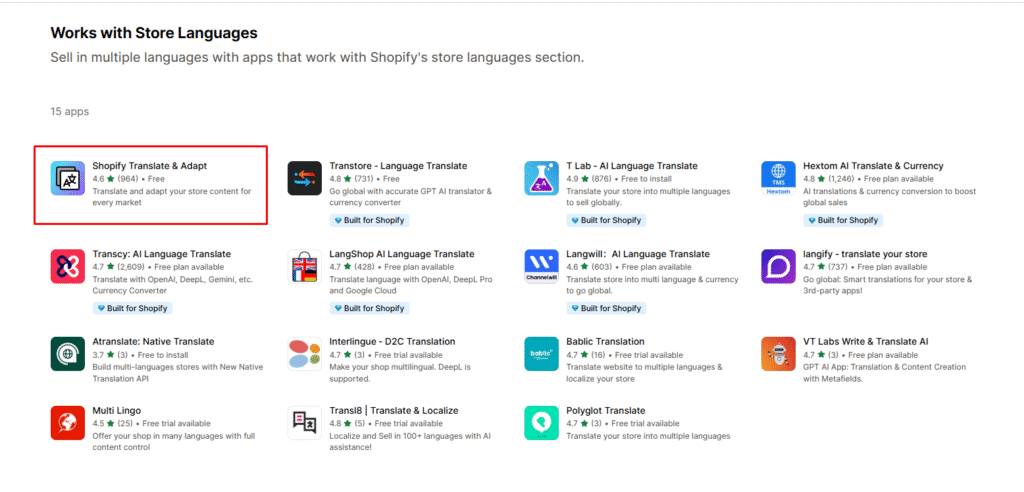
Step 2: Install Shopify Translation App
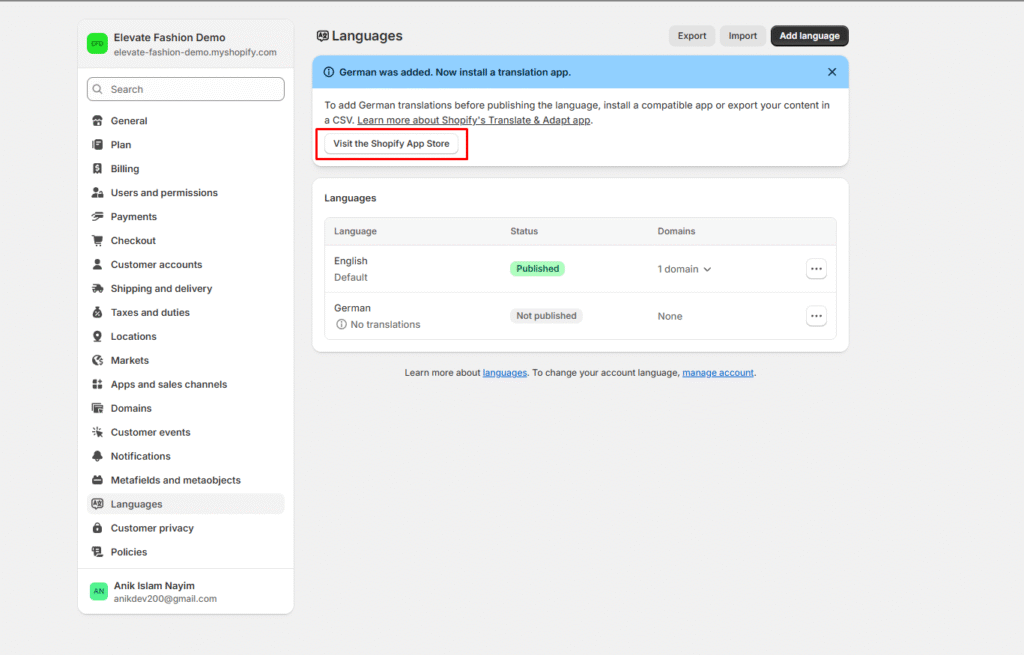
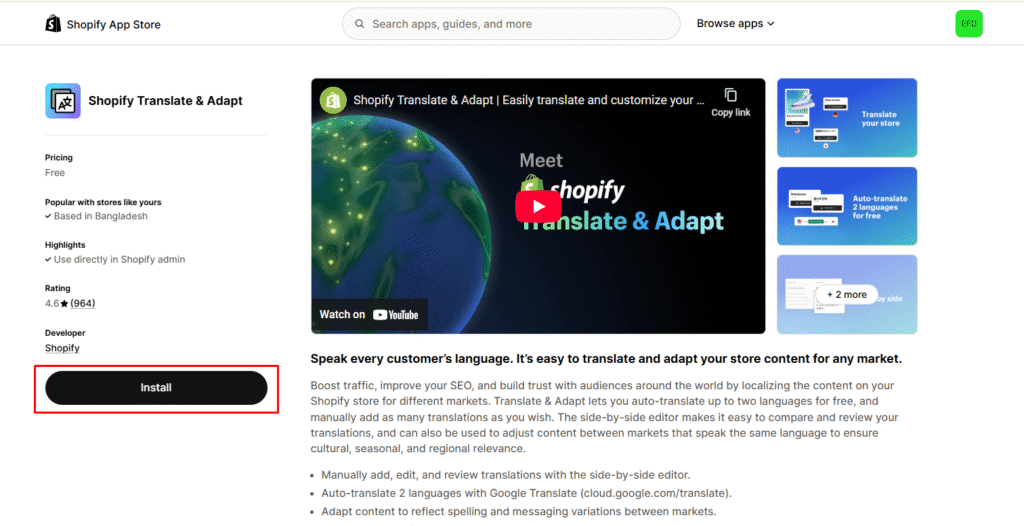
Install the official Shopify translation tool:
Search for “Translate & Adapt” in the Shopify App Store
Install the official Shopify app
Complete the setup process
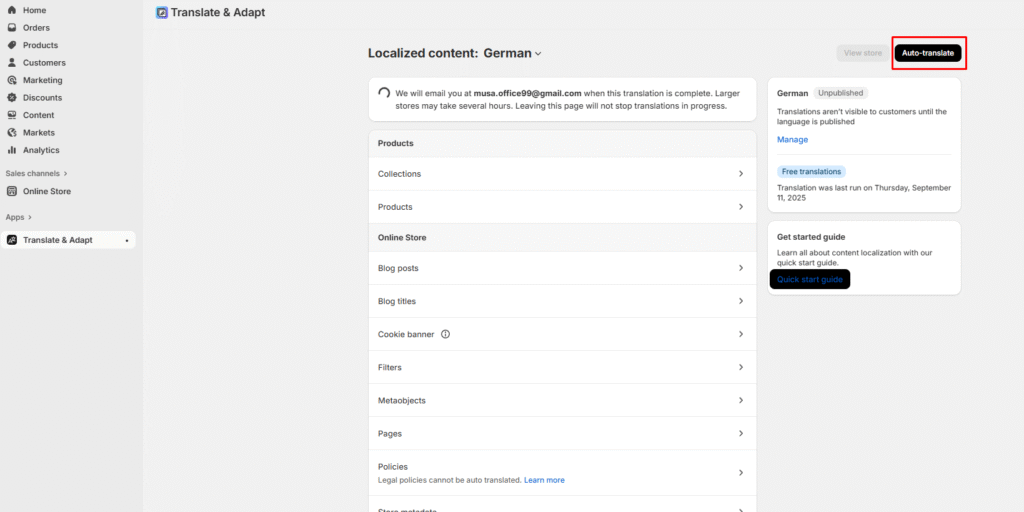
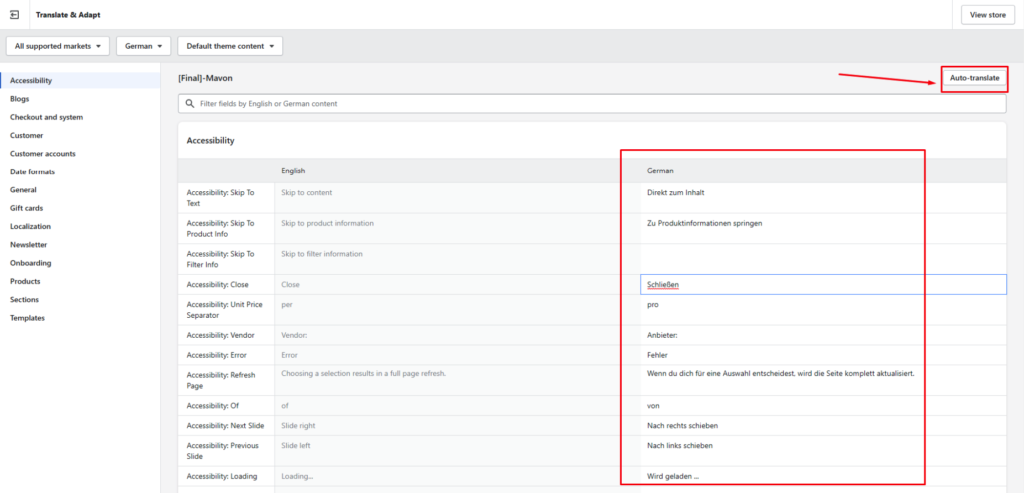
Auto-Translate Option:
Click “Auto-translate” button (highlighted in red box) for quick machine translations
This will automatically translate all your theme’s visual content and changeable content
Review and edit the results for accuracy
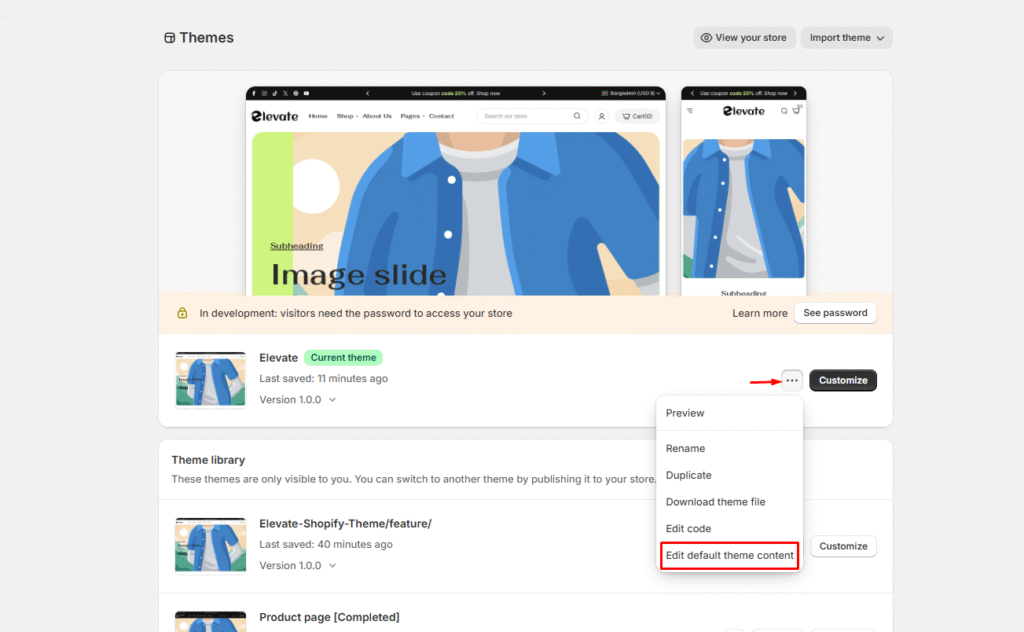
Step 3: Access Theme Content Editor
Navigate to your theme’s translation settings:
Go to Admin > Themes
Click Actions on your active theme
Select “Edit default theme content”
Step 4: Open the Localize Page
Access the translation interface:
Look for the “Localize” option in your theme editor
Click to open the localization page
Step 5: Select Your Language
Choose the language you want to translate into:
Find the language selector dropdown
Select your target language from the list
The page will update to show translatable content
Step 6: Translate Your Content
Choose your preferred translation method:
Auto-Translate Option:
Click “Auto-translate” for quick machine translations
Review and edit the results for accuracy
Manual Translation Option:
Translate each text element individually
Provides complete control over translation quality