Address
304 North Cardinal St.
Dorchester Center, MA 02124
Work Hours
Monday to Friday: 7AM - 7PM
Weekend: 10AM - 5PM
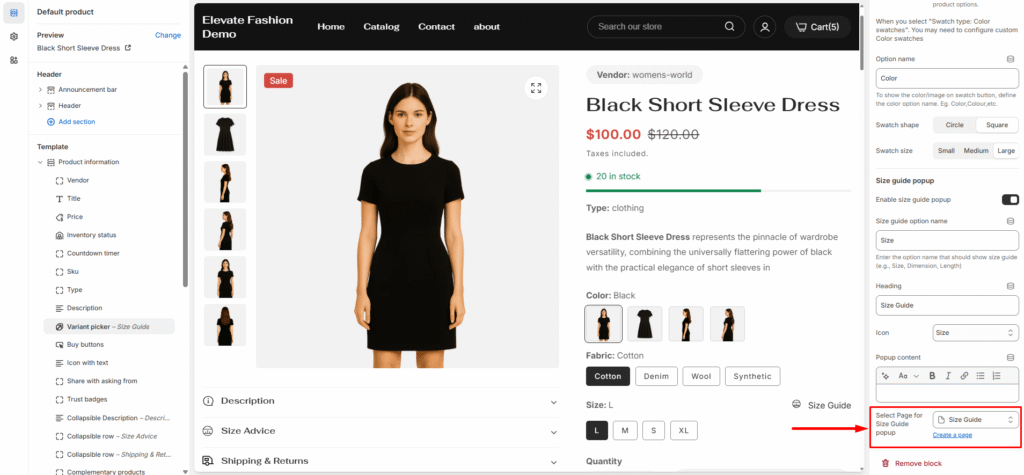
If you sell clothing or other items where size matters, adding a size chart helps customers make confident purchasing decisions and reduces returns. Here’s how to create and implement one:
Navigate to Online Store > Pages in your Shopify admin, then click Add page to create a new page dedicated to your sizing information. Add your size chart content, including measurements, fit guides, or any other sizing details your customers need.
Once your size chart page is ready, you can add it to your product pages:
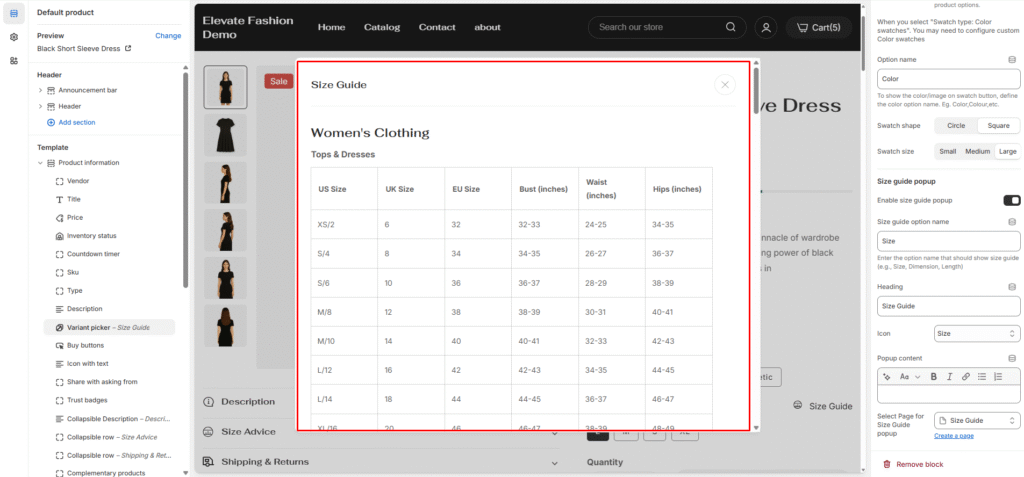
When customers visit a product page and see the specified option (like “Size”), they’ll notice a size guide link or button. Clicking it opens a popup window displaying your size chart content, allowing them to reference measurements without leaving the product page.
This seamless integration keeps customers engaged while providing the information they need to make the right size selection.