Address
304 North Cardinal St.
Dorchester Center, MA 02124
Work Hours
Monday to Friday: 7AM - 7PM
Weekend: 10AM - 5PM
Custom badges help highlight special products, promotions, or new arrivals, making them stand out to customers browsing your store.
Navigate to the Custom Data Settings section in your Shopify admin dashboard to begin setting up your badge system.

Add a new metafield definition with the following specifications:
Required Information:
meta.product_new_badge (This must be entered exactly as shown)This metafield will control when and how your custom badges appear on products.
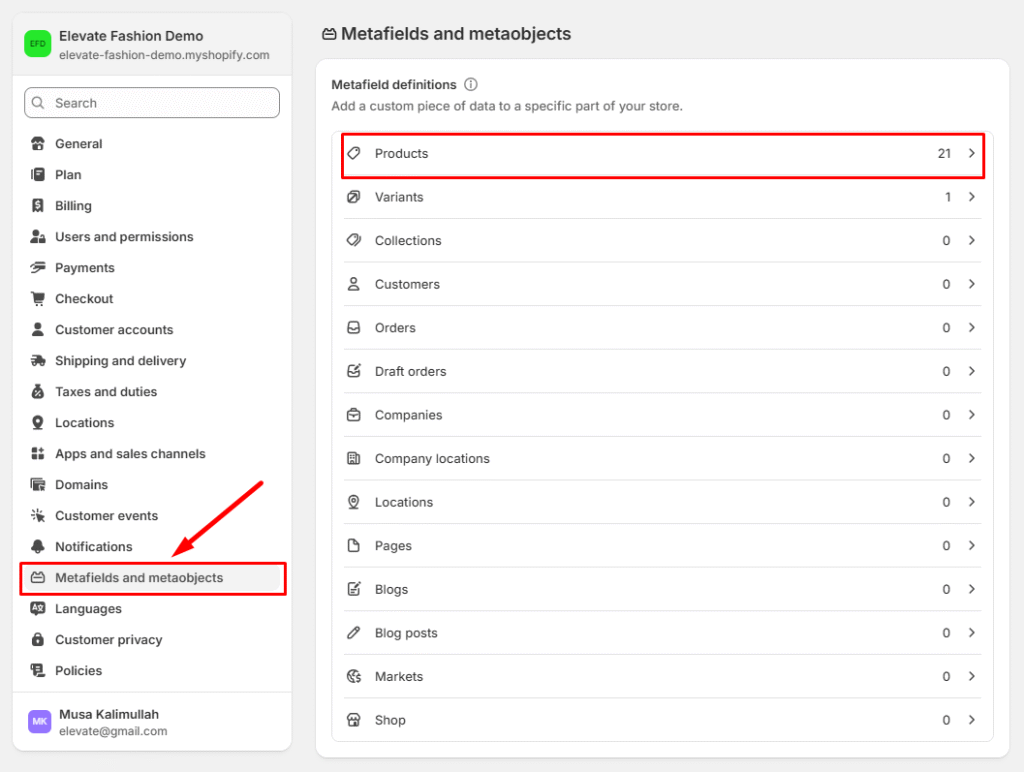
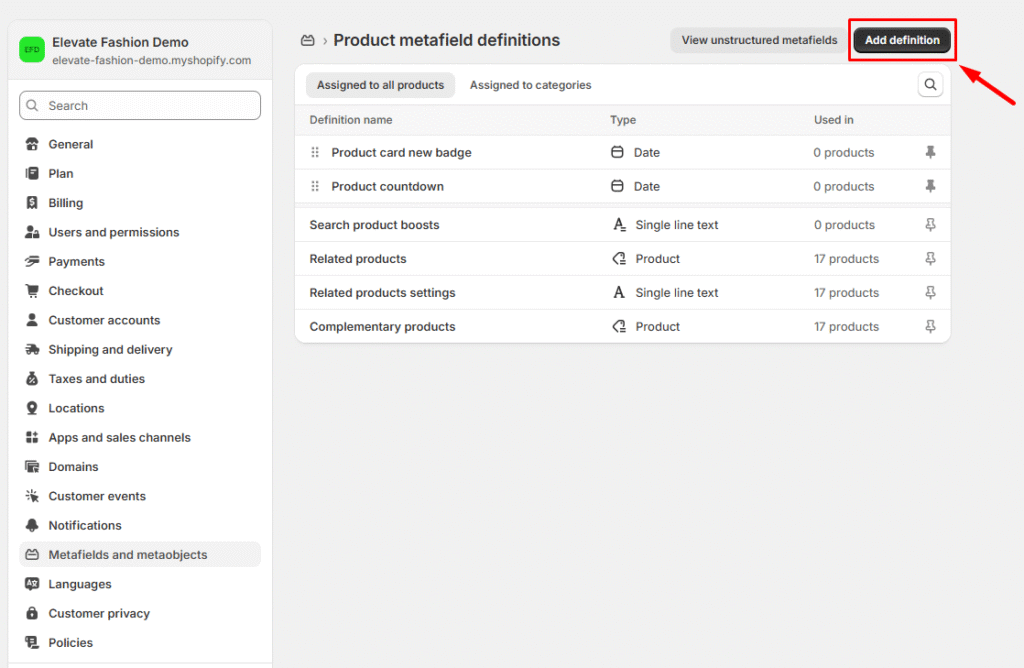
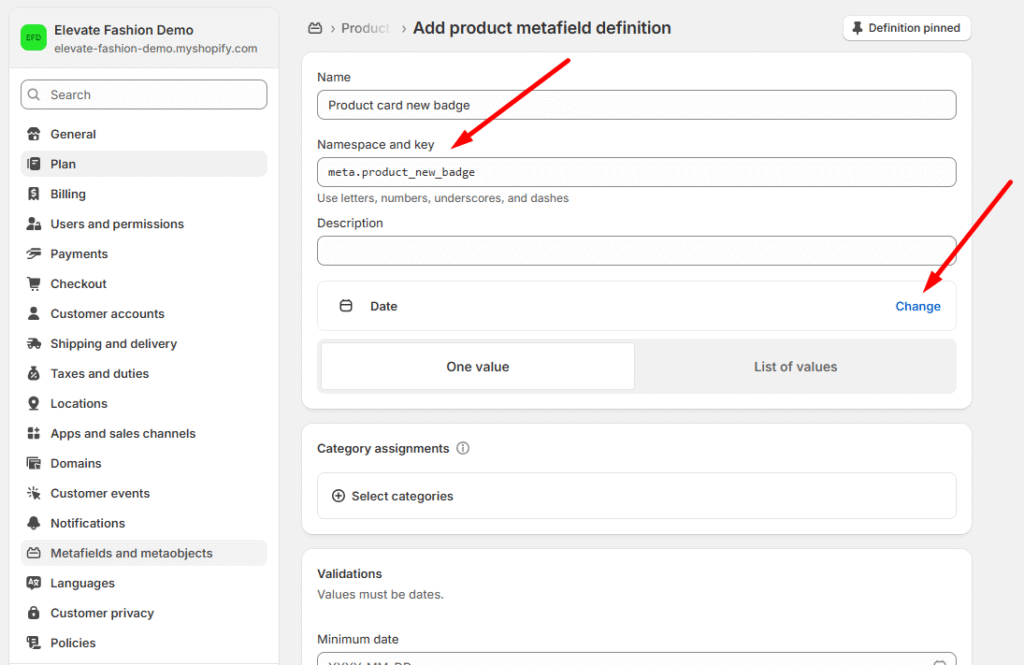
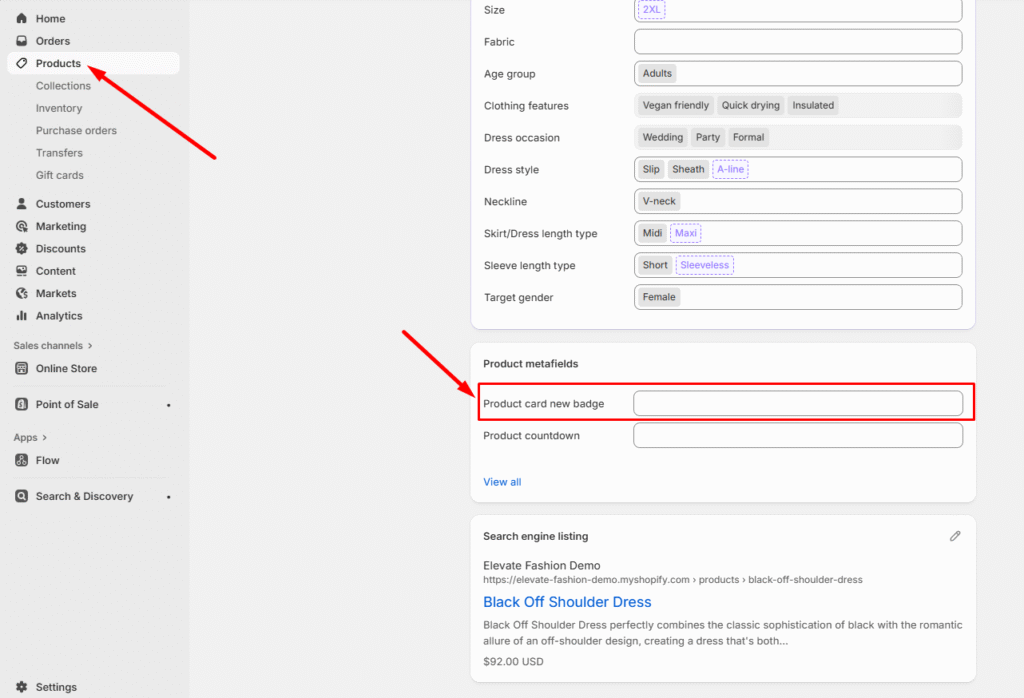
For each product where you want to display a badge:
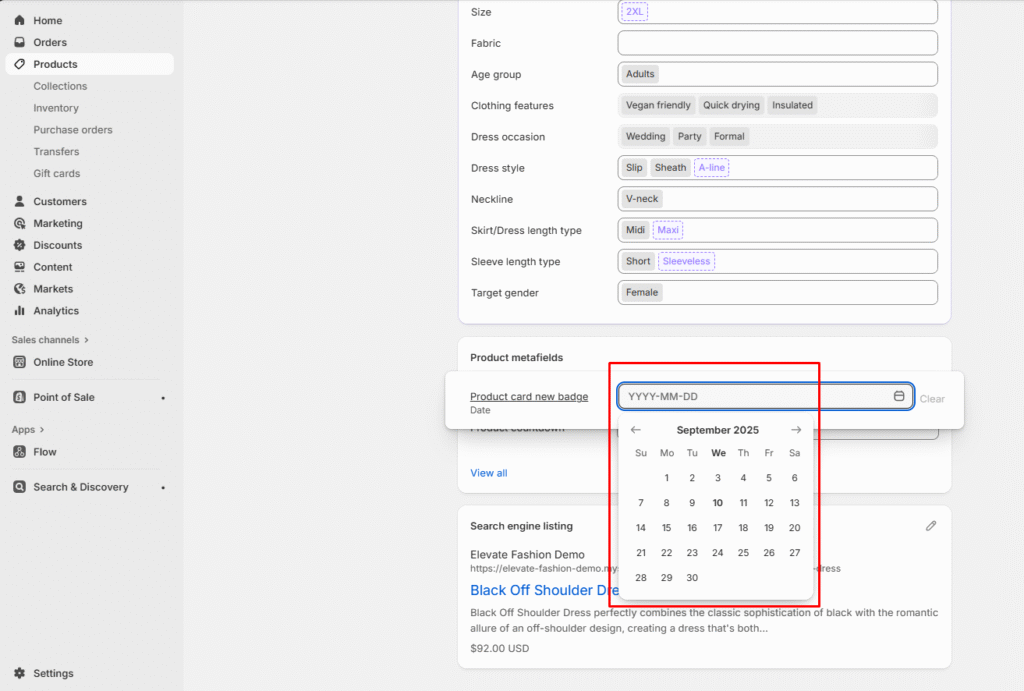
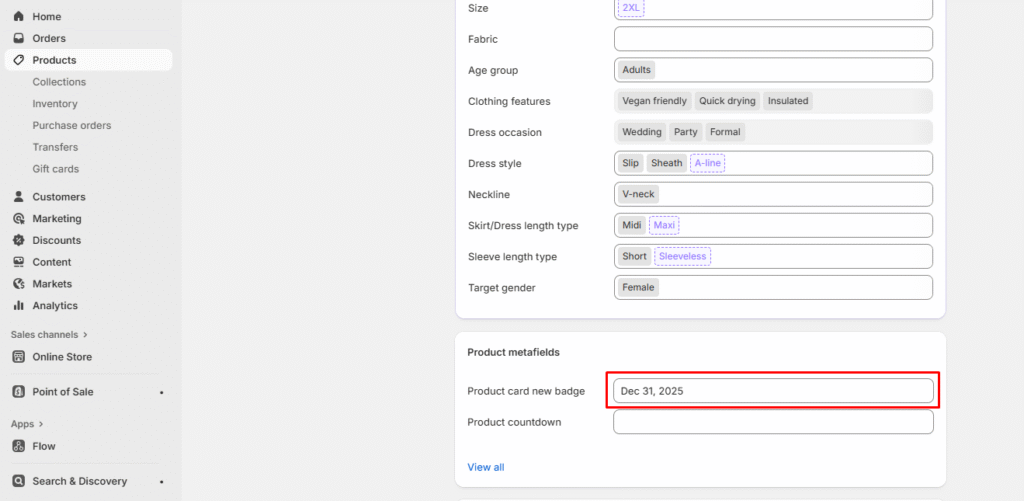
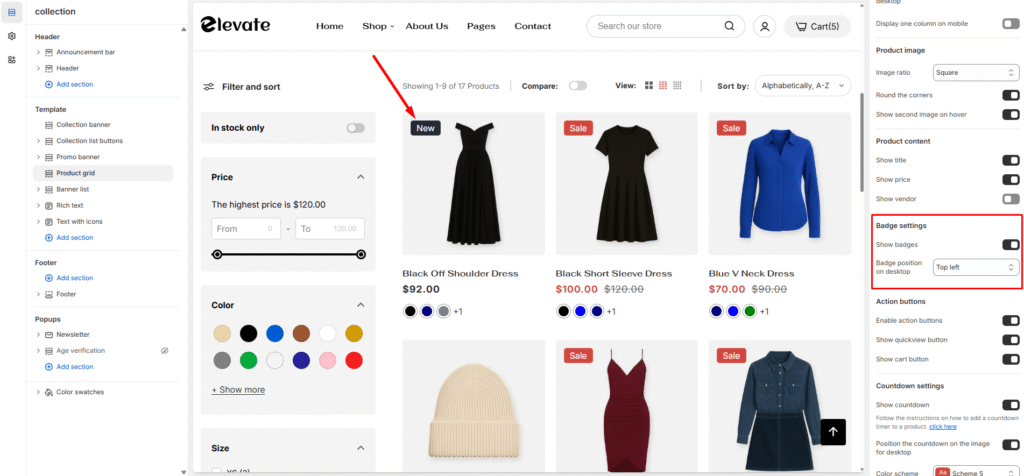
To ensure your badges work across different languages:
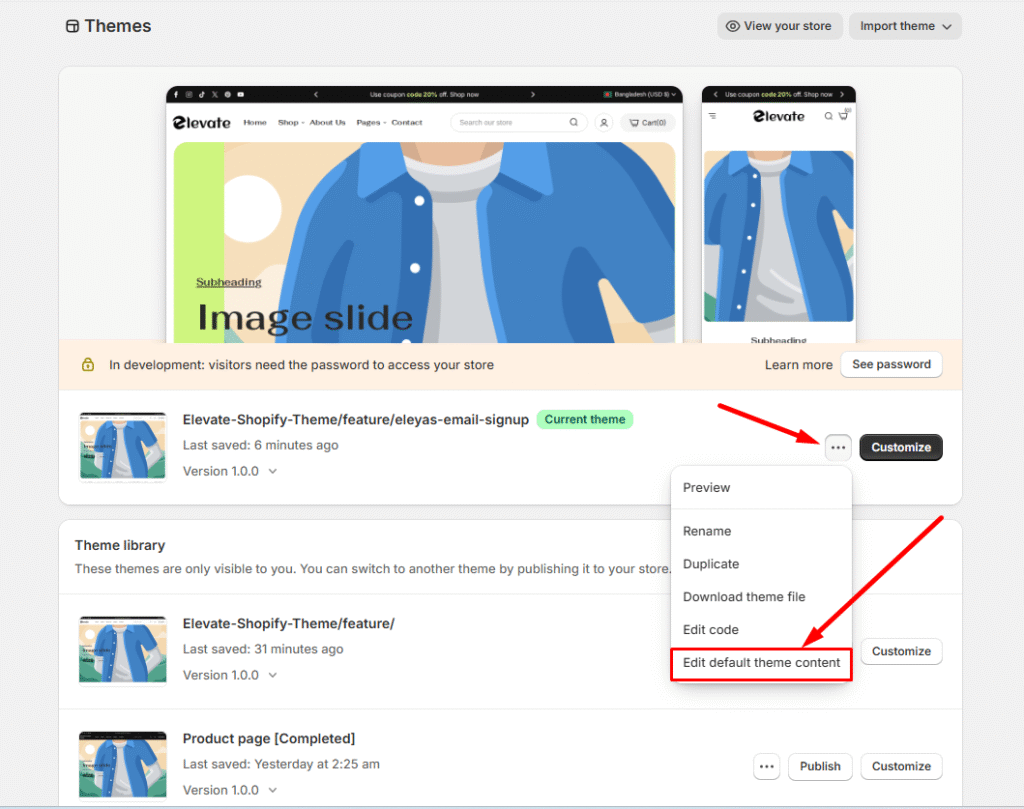
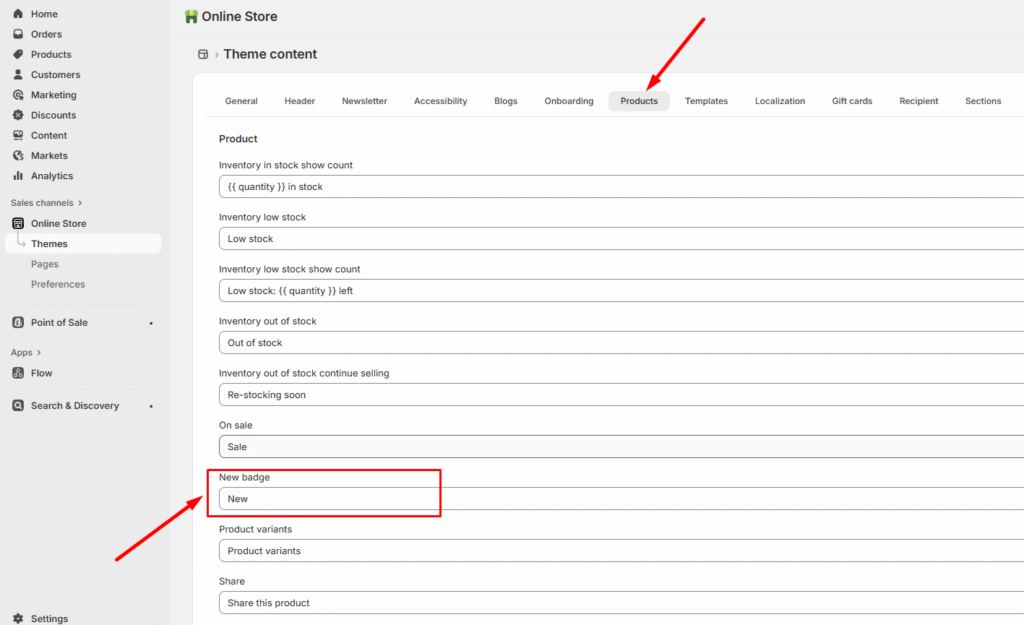
This system gives you complete control over when, where, and how your product badges appear, helping you create more effective product merchandising strategies.
Step 1: Select the Variant Picker Step 2: Choose Your Variant Picker Type You have…
Read moreIf you sell clothing or other items where size matters, adding a size chart helps…
Read moreProduct short descriptions provide customers with quick, essential information about your products without overwhelming them…
Read moreElevate supports displaying a countdown timer on a product that counts down to the discount…
Read moreWarning! The display of content will be determined by the presence and value of product…
Read more