Custom badges are a great way to draw attention to special items, promotions, or new arrivals, helping them stand out as shoppers browse your store.
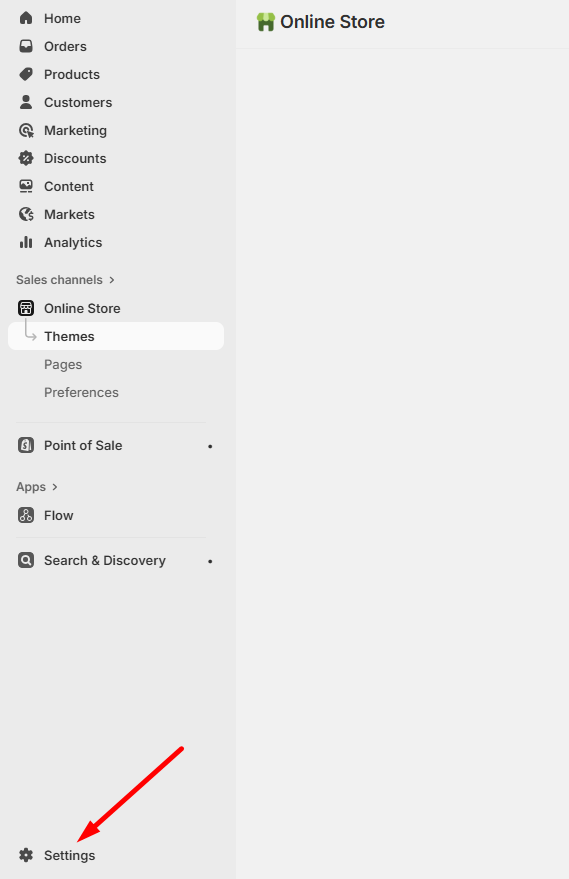
Step 1: Open Custom Data Settings
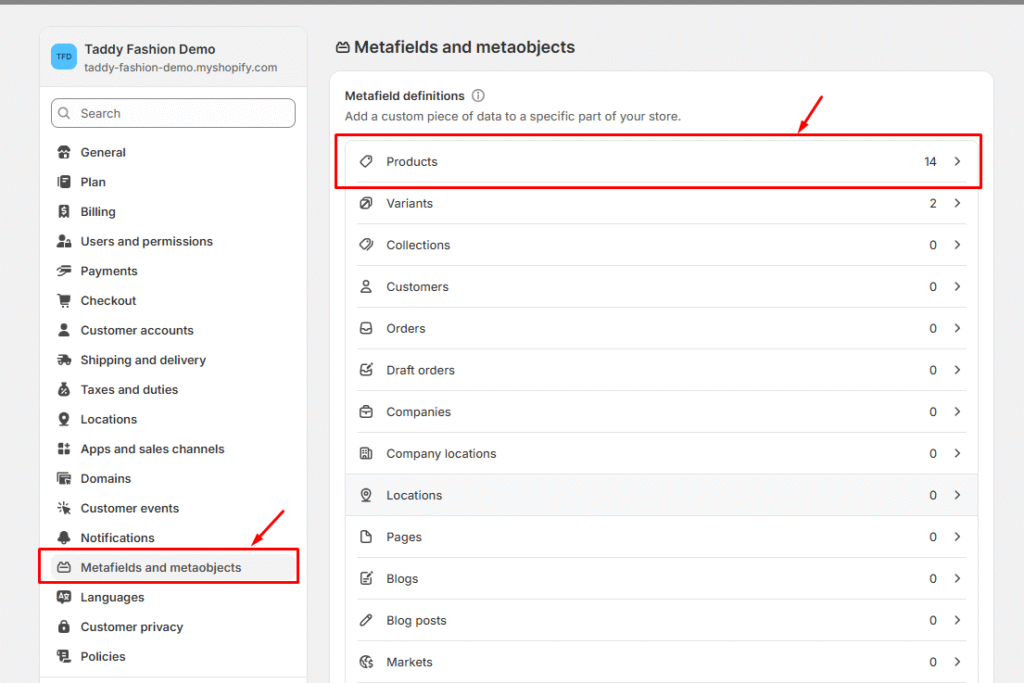
In your Shopify admin dashboard, go to Custom Data Settings to start configuring your badge setup.
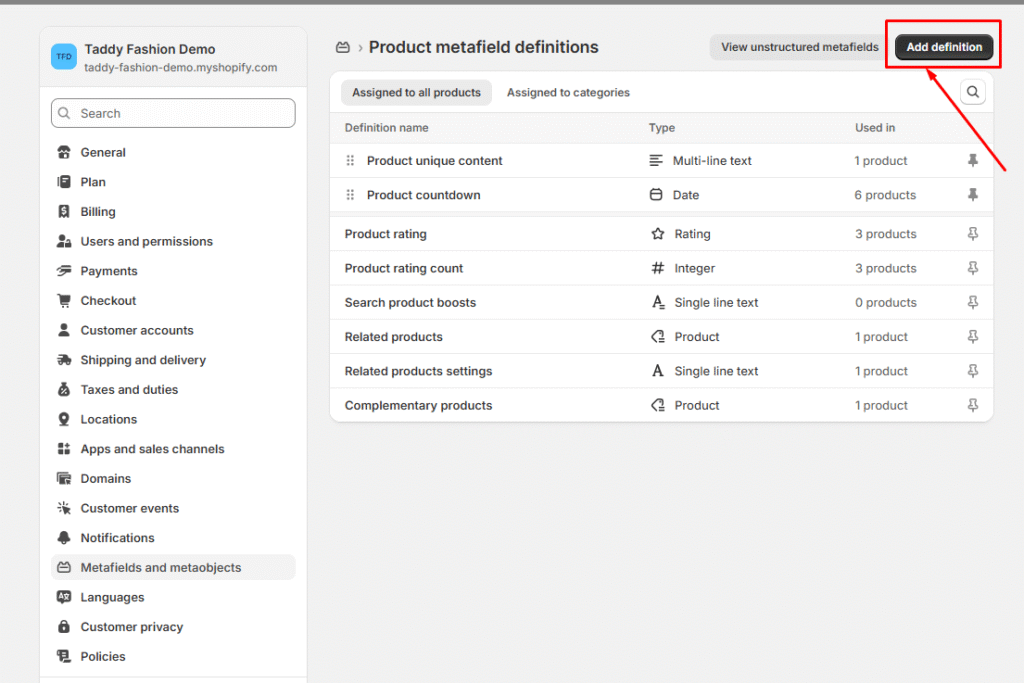
Step 2: Create a Metafield Definition
Add a new metafield definition with the following specifications:
Required Information:
Metafield Name: Product card new badge (You can customize this label as preferred)
Namespace and Key:meta.product_new_badge(This must be entered exactly as shown)
Type: Select “Date” from the available options
This metafield will control when and how your custom badges appear on products.
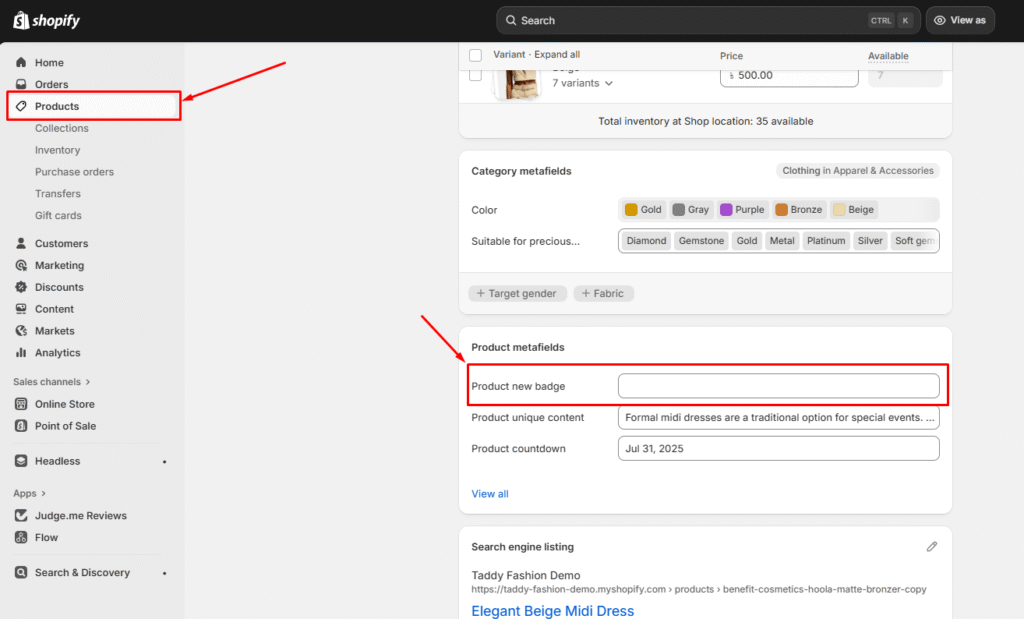
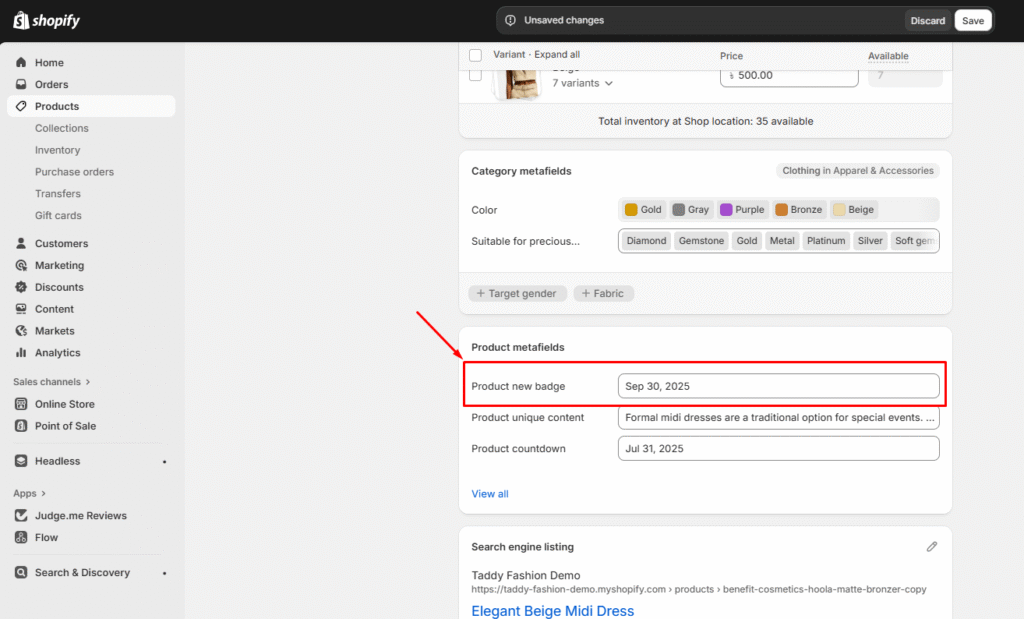
Step 3: Configure Product-Specific Badge Settings
For each product where you want to display a badge:
Navigate to Product Details – Go to the specific product page in your admin
Set Badge Display Date – Choose when the badge should start appearing
Configure Duration – Determine how long the badge will remain visible
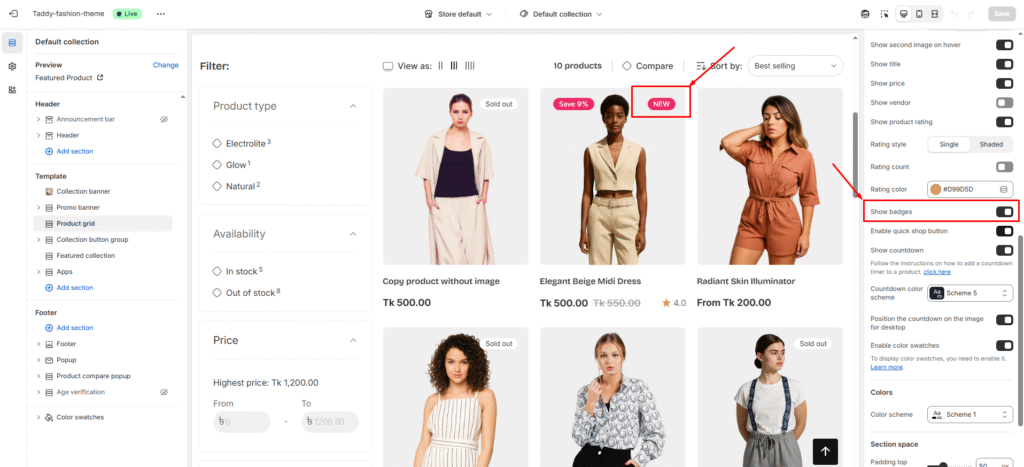
Enable Badge Sections – Choose which parts of your store will display the badge (product cards, product pages, etc.)
Set the date for the badge’s display period on the product page (Setting Badge Display Date):
Decide the duration for which the badge will appear on the product (Duration Settings):
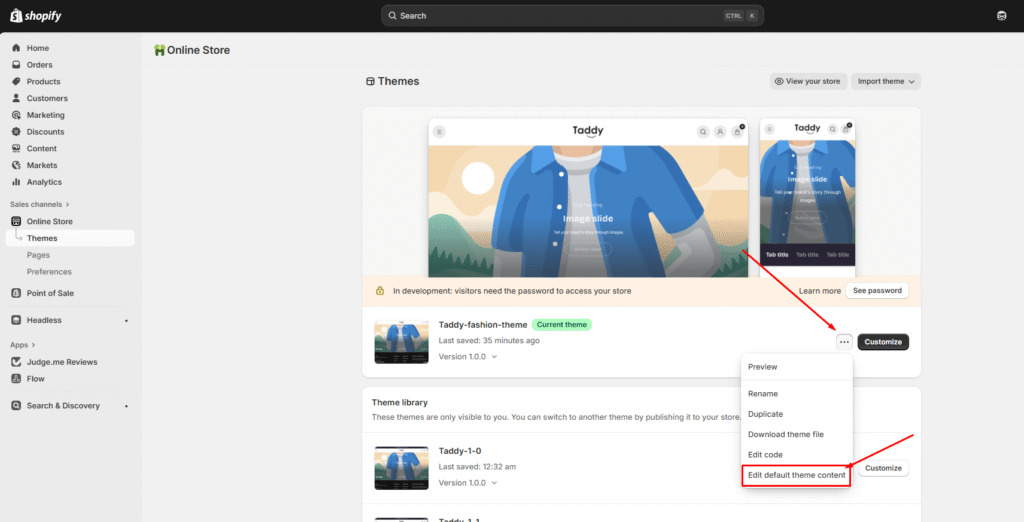
Step 4: Customize Badge Text and Localization
To ensure your badges work across different languages:
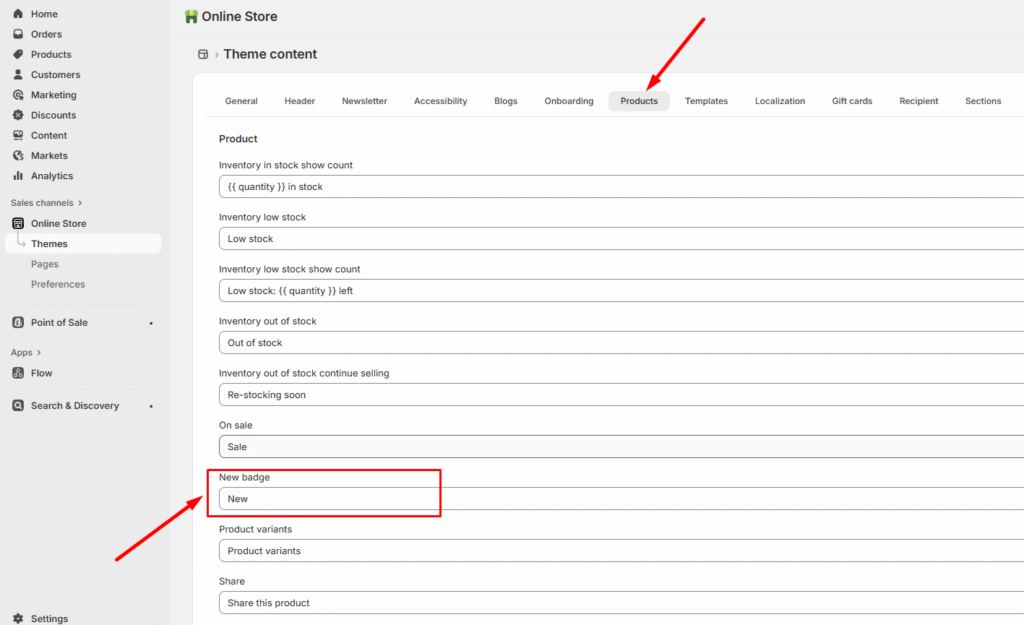
Access Theme Content – Go to “Edit Default Theme Content” in your theme settings
Translate Badge Text – Add appropriate text for each language your store supports
Benefits of Custom Badges
Draw attention to new products, sales, or featured items
Create urgency with time-sensitive promotions
Improve product discovery and customer engagement
Maintain consistent branding across your store
This system gives you complete control over when, where, and how your product badges appear, helping you create more effective product merchandising strategies.