This guide explains how to add custom color swatches with unique names and background colors to specific product variants in your Taddy theme.
Step 1: Create Product Variants with Custom Color Names
- Go to Products in your Shopify admin
- Select the product you want to add custom colors to (or create a new product)
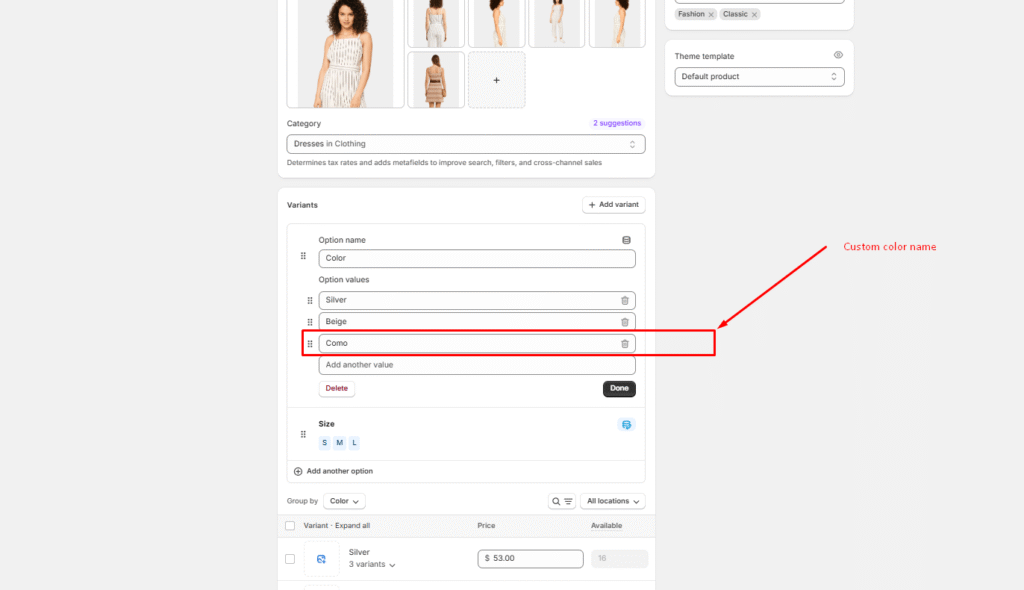
- Scroll down to the Variants section
- Click Add variant
- In the Option name field, enter “Color”
- In the Option values field, add your custom color names (e.g., “Como”, “Silver”, “Beige”)
- Each custom color name will appear as a separate variant option
- Click Done to save your variants
Note: You can use any custom name for your color variants – they don’t need to match standard color names.
Step 2: Enable Color Swatches in Theme Customizer
- From your Shopify admin, go to Online Store → Themes
- Click Customize on your Taddy theme
- Navigate to the Default product template
- In the left sidebar, scroll down to the Footer section
- Locate Color swatches and expand it
- You’ll see multiple Color item blocks
- Click on any Color item or add more blocks to configure it
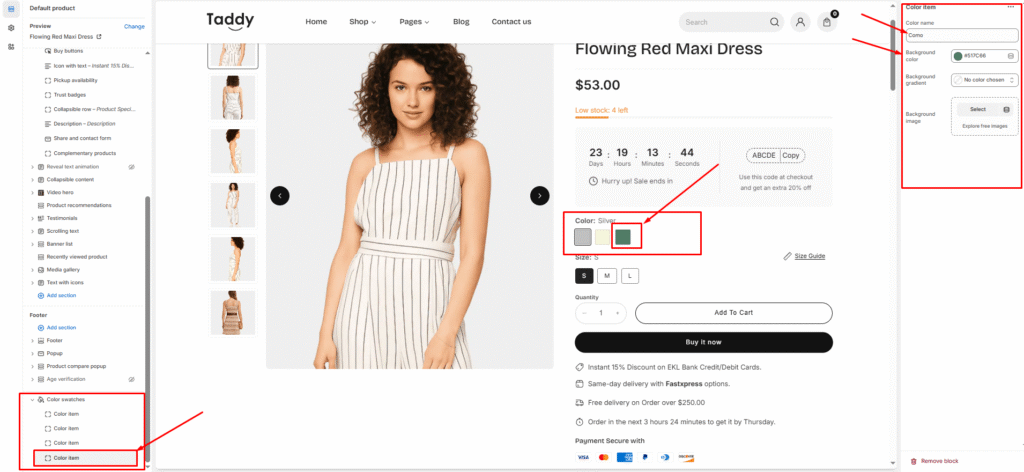
Step 3: Configure Custom Color Swatches
For each custom color you want to display:
- Click on a Color item in the Color swatches section
- Configure the following settings: Color name:
- Enter the exact custom color name you used in your product variant (e.g., “Como”)
- This must match exactly with the variant option value
Background color:- Click the color picker
- Enter a hex code (e.g.,
#67DC66) or select a color - This color will display as the swatch on your product page
Background gradient: (Optional)- Choose “No color chosen” for solid colors
- Or select a gradient if you want a gradient swatch effect
Background image: (Optional)
- Click Select to upload a pattern or texture
- This will display instead of the solid color if added
- Click Save when finished