Showcase different product types with layouts and design elements tailored to specific categories by creating custom product templates.
1. Access Template Creation
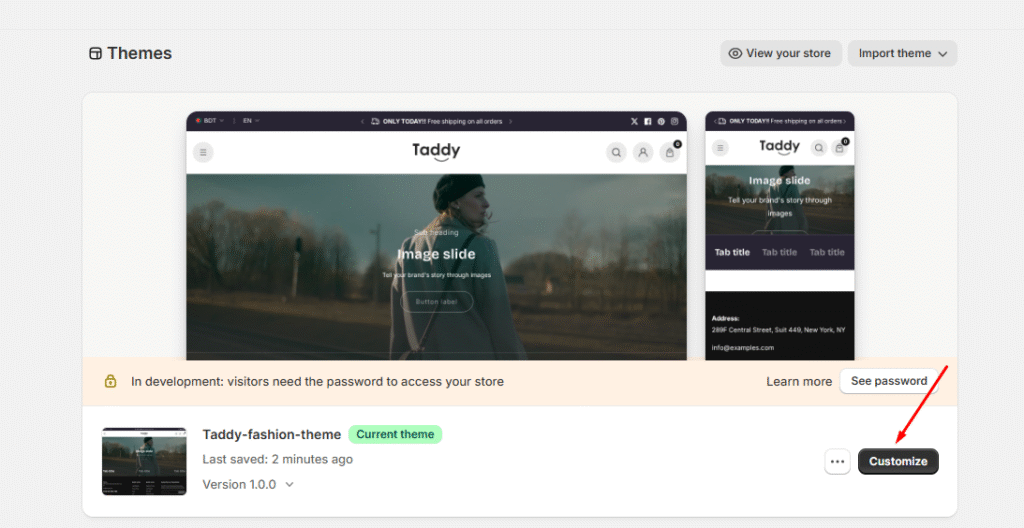
- From your Shopify admin, navigate to Online Store → Themes.
- Find your Taddy theme and click Customize.
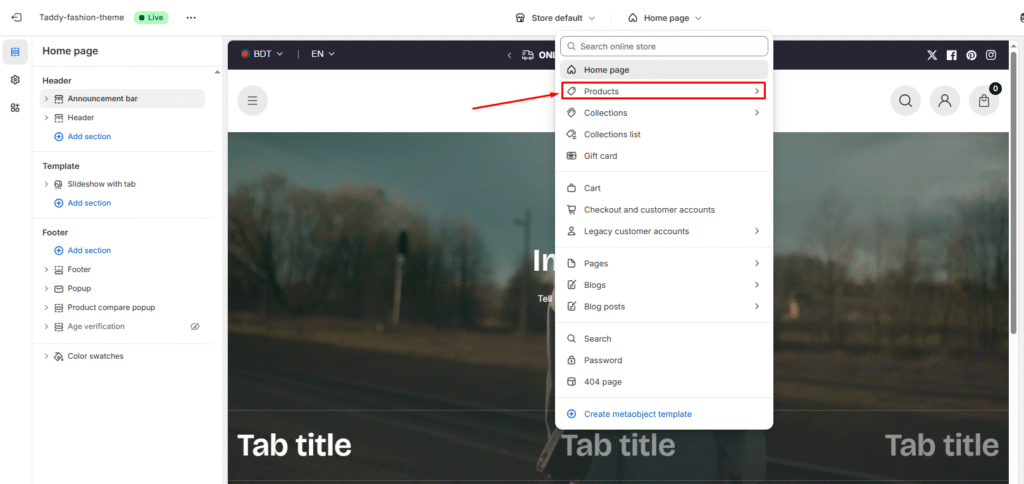
Next, click the top navigation bar and choose the Products tab under Templates.
2. View Existing Templates
Here you’ll find a list of all the product templates you’ve created. Each one can be customized to suit specific product types or categories.
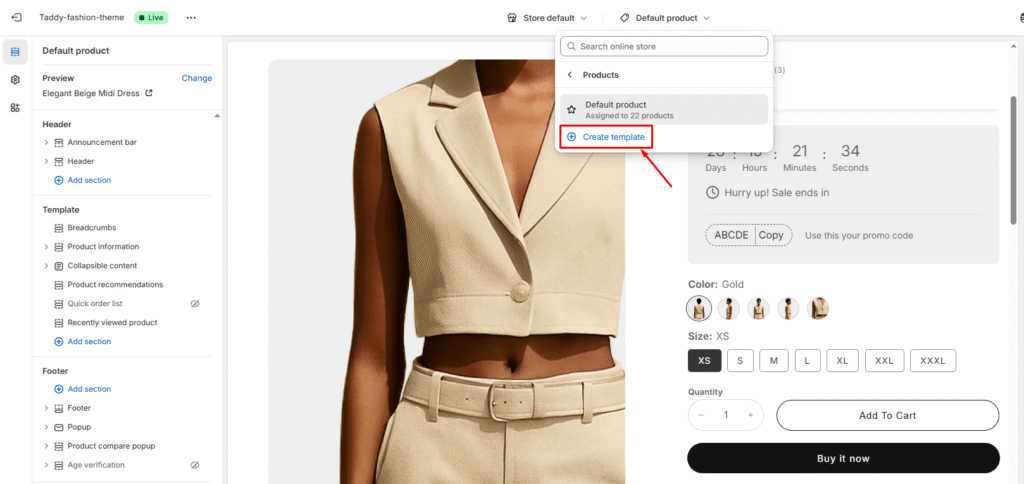
3. Create New Template
- Click the Create template button at the bottom of the template list.
- In the creation dialog:
- Name: Enter a name for the new template (e.g., Product Style 2).
- Based on: Choose an existing template that best matches the layout you want.
- Finally, click Create template to generate your new template.

Assign Products to a Template
After creating a new template, link it to the products you want:
- From your Shopify Admin dashboard, go to Products and open the product you’d like to update.
- In the product settings, navigate to Online Store → Theme template (right column).
- Select your newly created template from the dropdown menu.
- Click Save to apply the changes.

Template Management
- Multiple Templates: Create as many templates as needed for different product categories
- Default Behavior: Products without assigned templates automatically use the default template
- Template Assignment: Repeat the assignment process for other products that should use the same template
Your custom product template is now active and will display products with the unique layout and elements you’ve configured.